In a nutshell
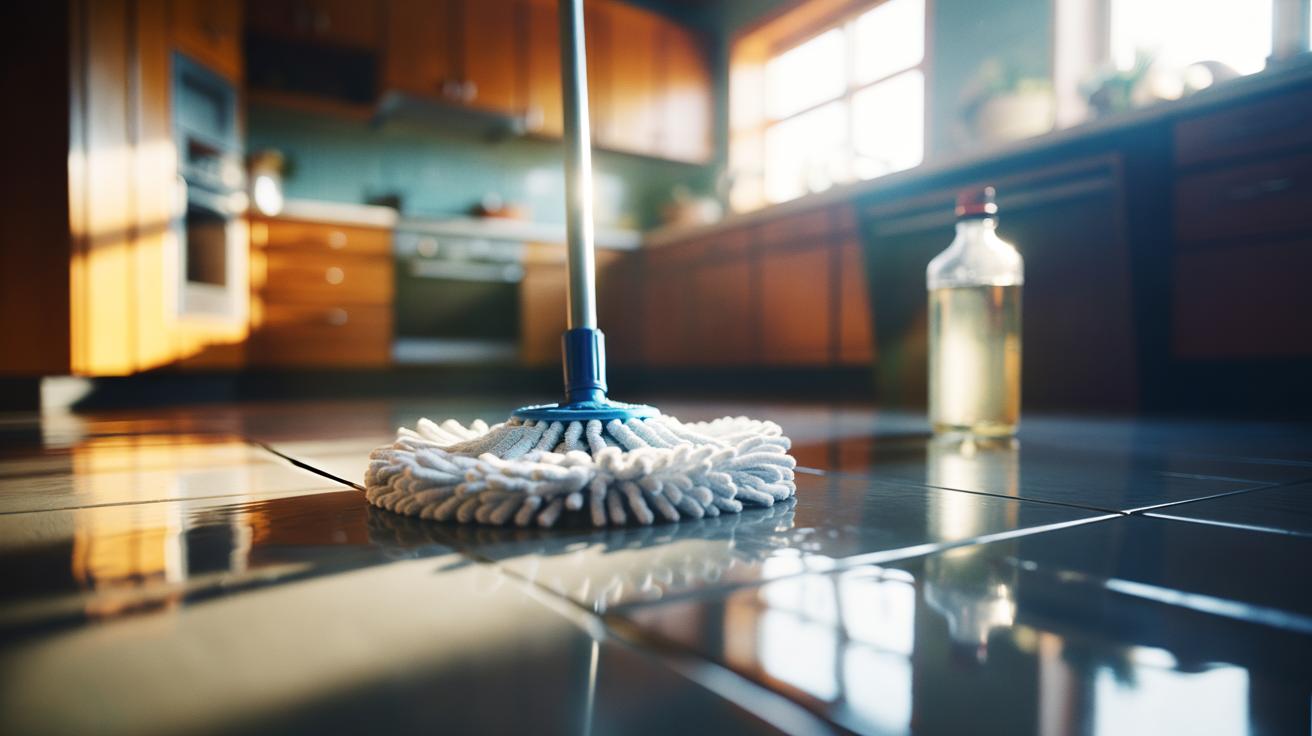
- 🧽 The vinegar-wrapped mop leverages acetic acid and microfibre to cut grease, light limescale, and odours, leaving sealed floors streak-free fast.
- ⏱️ Five-minute method: mix 1:3–1:5 dilutions, wrap a damp microfibre around the mop, use light overlapping strokes, pause on scuffs, flip cloth, and finish with a quick water wipe if needed.
- 🧩 Surface guide: sealed tile, vinyl, and laminates respond well; sealed hardwood for spot cleaning. Avoid natural stone and waxed floors; keep moisture minimal.
- ⚠️ Safety first: Never mix vinegar with bleach; ventilate if you smell chlorine, test a hidden patch, and be gentle on crumbly grout.
- 💷 Benefits: a low-cost, low-waste, fast-drying routine that refreshes high-traffic areas in minutes with simple kit and pro-looking results.
Britain has fallen for a humble hack with striking results: the vinegar-wrapped mop. No elaborate sprays. No perfumed residue. Just speed, shine, and thrift in one nifty move. By soaking a cloth in diluted white vinegar and wrapping it around your mop head, you can blitz through sticky spots, heel marks, and kitchen spills in minutes. It’s the kind of low-waste fix that suits busy households and rented flats alike. The science is simple but persuasive, and the finish is surprisingly glossy. Used correctly, it’s fast, safe for many sealed floors, and spectacularly effective on everyday grime. Here’s how it works—and how to do it in five minutes.
Why the Vinegar-Wrapped Mop Works
At the heart of this trick is acetic acid, the active component in white vinegar. It’s mild—around 5%—yet strong enough to cut through grease films, dissolve light limescale, and neutralise odours that linger after cooking. When you wrap a microfibre cloth soaked in diluted vinegar around a mop head, you increase contact time on the floor, letting chemistry do the hard work while you move swiftly. The cloth acts like a reservoir, delivering a thin, even layer of solution that loosens grime without drenching the surface.
That matters for speed. Less water means faster drying, so traffic areas are back in action in minutes. Microfibre’s split fibres lift fine dust and sticky residues that regular cotton can smear. On sealed tiles, vinyl, and many laminates, the result is a brighter, streak-free sheen with minimal effort. You’ll likely notice a faint vinegar note at first; it dissipates as it dries and takes kitchen odours with it. Always test a hidden patch if you’re unsure about the finish.
There are caveats. Avoid natural stone such as marble, limestone, and travertine; acids can etch the surface. Skip waxed finishes and any unsealed wood. Mind your grouting if it’s powdery or damaged. And one rule is non-negotiable: never mix vinegar with bleach or products containing chlorine. The combination can release hazardous gases. Used solo and diluted, though, this is a reliable, low-cost workhorse.
Five-Minute Method: Step-by-Step
1. Mix the solution. In a bucket or bowl, combine white vinegar and warm water. A practical starting ratio is 1:3 (vinegar:water) for greasy kitchens, 1:4 or 1:5 for routine freshening. Warm water boosts dissolving power and speeds drying. If the room is tiny, halve the quantities to avoid waste. Optional: a drop or two of tea tree or eucalyptus oil for a fresher note—keep it minimal to prevent streaks.
2. Prepare the wrap. Submerge a clean microfibre cloth in the solution, wring to “damp” rather than dripping, then wrap it tightly around the mop head. Tuck corners under so it grips. This creates a controlled, low-moisture cleaning pad. The aim is contact time without puddles.
3. Work smart and fast. Start at the far corner and advance towards the exit. Use light, overlapping strokes and let the solution sit for 20–30 seconds on scuffs before a second pass. Skirt along skirting boards and under kickboards, where crumbs accumulate. For sticky patches—spilled squash, dried jam—press the mop head down for a brief pause rather than scrubbing furiously.
4. Finish and dry. In high-traffic zones, flip the cloth to a cleaner side midway. If residue remains, a quick wipe with a second cloth dampened in plain water eliminates any film. Open a window. Most sealed floors will be dry inside five minutes. If the floor feels tacky, you used too much product—reduce vinegar or wring harder next time.
Surfaces, Dilutions, and Safety at a Glance
Not all floors are created equal. The vinegar-wrapped mop excels on sealed, non-porous surfaces but demands caution on delicate materials. Use the table below as a pocket guide, then adapt to your home’s finishes and soil levels. When in doubt, lighter dilutions and smaller test areas keep you safe. Remember, the goal isn’t saturation; it’s targeted, quick cleaning with minimal moisture, especially vital for flats with limited ventilation and winter drying times.
| Floor Type | Dilution (Vinegar:Water) | Notes |
|---|---|---|
| Sealed ceramic/porcelain tile | 1:3 to 1:4 | Great for grease and light limescale. |
| Vinyl or LVT | 1:4 to 1:5 | Low moisture; avoid soaking seams. |
| Laminates | 1:5 | Damp only; never wet-mop heavily. |
| Sealed hardwood | Spot clean 1:5 | Check manufacturer guidance; wring well. |
| Natural stone (marble, limestone) | Do not use | Acid can etch; choose pH-neutral. |
| Waxed floors | Avoid | May strip the finish. |
If you smell chlorine, stop immediately—someone has used a bleach-based product. Rinse the area with plenty of water and ventilate. Store vinegar away from bleach and ammonia under the sink to prevent accidental mixing. For grout that’s crumbly or unsealed, keep passes quick and minimal; consider a pH-neutral cleaner instead. And to prolong mop life, rinse the cloth in clear water after use, then machine-wash it on a cool cycle. A small routine with a big payoff: cleaner floors, less waste, lower cost.
For households looking to cut costs and tame cluttered cleaning cupboards, the vinegar-wrapped mop is a rare win-win. It’s frugal, fast, and unfussy, turning weeknight messes into five-minute jobs with a finish that looks professionally refreshed. You’ll still keep a pH-neutral cleaner for stone or specialty surfaces, but for most sealed floors, this hack earns a permanent spot. The secret is restraint: light dilution, light moisture, light pressure—repeated consistently. Ready to wrap, swipe, and shine your way to a calmer, cleaner kitchen? What tweaks—ratios, cloth types, or routes—will you try first to make the method your own?
Did you like it?4.4/5 (29)